First off, let's get some misconceptions straight. Many people believe you need to purchase a thousand-dollar DSLR to take an excellent photograph. Know they are wrong, as it's not the camera, but instead the nut behind the viewfinder that determines a good shot. Better cameras will only make it easier to take a better photo.
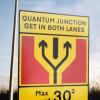
Today, many point and shoots (this is the name for the average camera that many people use, with a permanently attached lens) have over 10 mega pixels, or MP (How many pixels in the photo. Higher, the more detailed photograph. It's not that big of a deal though). When I first started learning photography with an old Kodak P850, it only had a capability of 5.0MP. This proved to be annoying when trying to take good photos. But I learned and experimented with it, which lead to photos like this:

Look's pretty good, doesn't it? Again, it's not the camera, but instead the photographer

To start out, you'll need a camera (If you couldn't guess that one, just click out of this window now
 ), and a simple subject such as a candle or plant outside. Look in your camera's manual for information on "Manual" shooting, what you'll only be using from this point on. Also, look for things like "White Balance" and "Advanced Shooting". Be sure to read those topics throughly in your manual, it will teach you many things. Forget automatic completely
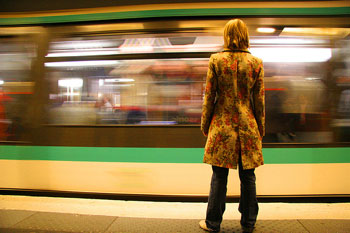
Next, find a place outside where you can place your subject in a bright spot. Look at it from every angle (without your camera for now), from laying down to standing up. Consider the thirds rule - the positioning of your subject in your photograph. See the image below:

See how the bird is place on the right vertical line? That's proper positioning of your subject in the frame of your camera. There are exceptions of course, but 99% of the time you'll want to follow the thirds rule.
Now grab your camera. Set your camera to "Manual" mode, which should have shutter speed, aperture, and ISO settings, again explained in your manual for your specific camera. Here's what they all mean:
Shutter Speed: the speed of the shutter in front of the sensor. The shutter opens and closes faster than you can blink, to expose the digital sensor in your camera. This is what takes the photograph. The speed of the sensor determines 1) how bright your photo is, and 2) how much motion blur is in your photograph. In photography, you'll soon learn one thing does not control one thing; there is no one button for lighting or colors etc.
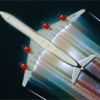
A slow shutter speed (around 1/10th of a second) will look like this:
A fast one (About 1/800th of a second) like this:

Notice the blur in the first one. Moving on to aperture:
Aperture: Sometime referred to as F-Stop, this setting determines how much of your subject is in focus. It is the opening inside lenses. An aperture setting looks something like this: F7.1. This is confusing though, because a big number means a small opening; a smaller number a larger opening. Here's an example of F-Stop:

Again, this controls two things: 1) The "Depth of Field", and 2) the brightness of your photograph. Yes, you may use either Aperture or Shutter Speed to determine the brightness, you will learn from experimentation which one to use in whichever situation you are in.
ISO: The sensitivity of your sensor. Higher settings will result in a noisy photo, but an artificially brightened photograph.

Notice how the image on the right has more noise (The speckles or dots in the photo) than the one on the left, courtesy of a higher ISO. Again, higher ISO settings are useful in situations where your only option for light is artificial.
The best way to learn photography is by trial and error. This does this, that results in this, once I do this, I have to do this, etc. Play around with the settings on your camera and compare the results.
The Mighty White Balance
What is white balance? It's the balance of colors in your photograph. You must change your WB every time you change lighting conditions, ie. from indoor fluorescent to outdoors. How to set it manually can be found in your manual. You'll need a gray card, which can be as simple as a piece of copy paper colored completely with a gray colored pencil.
That pretty much covers what you will need to know in order to get started in professional digital photography. Send me a PM if you have any further questions, and check out these websites for even more tutorials, and places to buy cameras and equipment:
Photography.com
BHphoto.com
Newegg.com
For some amazing photography of planes check out Airliners.net and Jetphotos.net
Here is some of my work:


Happy Shooting!
Edited by anonymous, 20 March 2010 - 06:38 PM.


 !
! 
 !
!